I didn’t really plan to do a tutorial here on the blog, but my husband’s hand cast broke, so I cast my hand one day and took some progress shots. I selected basic white plates for a chance to get approval from dh to hang in our living room. But, there are so many creative options for the plate. If you end up trying this, please send me photos of your completed projects!
Project List
• Casting container–I used glass bowls. Plastic would be good. You want something with a flat bottom and smooth, steep sides with a diameter big enough to leave at least 1/2″ clearance around the hand print.
• 1 plate per cast
• Plate hangers -1 per plate. I went looking at a craft store for those wire ones that grip the edges, but found these fantastic fabric ones. They were the same price. They remove with water and best of all, they are hidden. Both types of plate hangers come in two sizes, so you may want to bring your plate to the store to get a hassle-free fit.
• Wall art hangers–I like the white plastic ones with 4 thin metal nails. They are secure, easy to pound in and don’t damage the wall too much.
• Plaster of Paris-Available at the craft store for a premium or in a hardware store in large bags near the concrete mixing supplies.
• Water
• Paperclip + wire cutters (if using an inflexible mold like a glass bowl)
Directions for making a Cast Hand Plate
I’m sorry they are probably more detailed than they need to be, but I like very detailed directions with explanations, so that’s what I’m providing you.
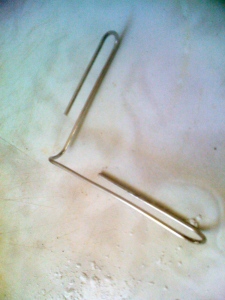
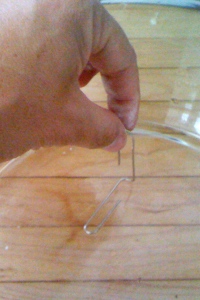
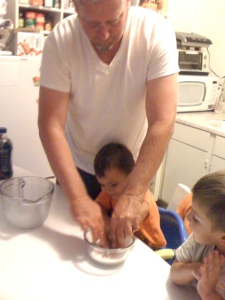

1. Bend paperclip as shown.
2. Place in bottom of mold as shown.
3. Follow plaster of paris directions. You can estimate the amount of plaster you need by pouring water into the bowl until it is 3/4″ high. Then pour and mix plaster in another container (do not be tempted to mix plaster in the final container as it will have a harder time releasing).
4. Wet the interior surface of the container (this helps with release).
5. Fill the casting containers with prepared plaster about 1″ deep.
6. Lift container gently and tap onto surface to release bubbles.
7. Let set. TImes vary depending on moisture content, so I just kept testing the residual left in the pour container.
8. Once it shows it is beginning to firm up a bit, wet the hand and place it flat into the plaster. Push down and don’t be afraid to squeeze plaster through fingers a bit. We’ll sand off peaks later.
9. Hold in place for 1 minute, more if plaster hasn’t set enough yet. You can always slide your hand back in if it doesn’t look like it’s holding the shape yet. Some milky water will pool back in to the hand depression.
10. Pull hand away ( I like sliding it out to discourage peaks from forming. Wash hand immediately.
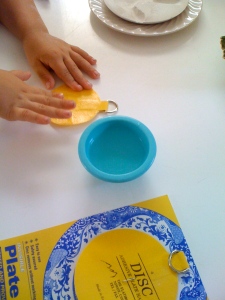
WARNING: *NEVER* keep skin in direct contact with plaster of paris (like attempting to cast a body part). The curing process creates a great deal of heat and can cause
THIRD DEGREE BURNS! 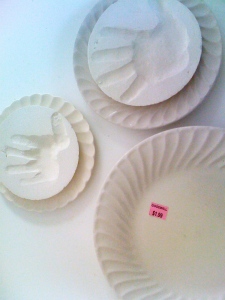 TIP: I recommend letting plaster set on all utensils (setting plaster can clog drains!) then scrape, brush and wash utensils.
11. Let cast set in a dry area for 24 hours undisturbed. While cast is curing, apply plate holder (follow directions on holder).
12. Remove cast from container by pulling gently but firmly on the paperclip. You may have to use a fork or needle nose pliers to get a better grip. Straighten paperclip and move around a bit to loosen top layer of plaster. Snip paperclip just below the surface by poking tip of pliers into plaster a bit.
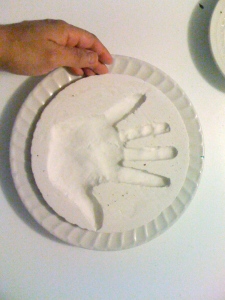
13. FUN PART! Take the casting outside and slide it gently face down back and forth by holding your hand evenly over the back side. Check often until the desired hand exposure is achieved. You may have to clip more of the paperclip. Adjust pressure points as needed. Just go slow. If you push too hard in one area before it’s very flat, you can crack the casting.
14. Remove loose plaster by brushing and blowing.
15. Spray with a generous amount of clear acrylic sealer in a well ventilated, well protected area (Don’t be tempted to spray on your sidewalk as even clear will leave a discolored area and will irritate your S.O.).
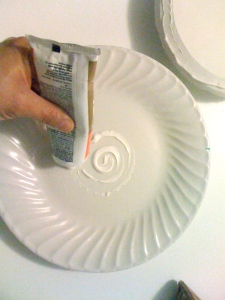
16. After sealer is dry (about half an hour), fit casting to plate. You want as much even contact with the plate as possible so you may want to sand the edge or the center if your plate is a bit convex. Clean plate with rubbing alcohol to insure good contact. Apply plaster-friendly glue to areas that will be in contact with one another. I used Liquid Nails. It has an appealing creme color that matched my plates. I also like Goop. I would not recommend hot glue gun here.
*BE SURE TO LINE UP TOP OF HAND WITH PLATE HANGER*
17. ANOTHER FUN PART! Set hand firmly into place. Rotate a bit to get good contact and disperse glue.
18. Label the back with the castor’s name and date. I used a label maker and let the boys apply the stickers to their plates.
19. Hang it somewhere wonderful!
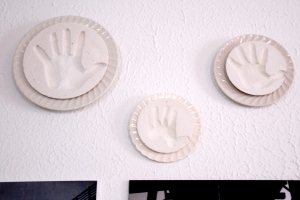
Send us a pic of your completed hand!
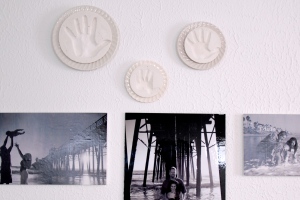
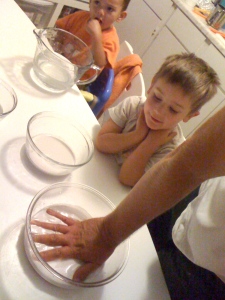 I bought a box of plaster of paris at a yard sale for 50¢. I thought it would be fun to cast hand prints of my boys one day for our craft time. The box of plaster sat on my kitchen counter for a couple of months waiting for the right moment. Then, when Father’s Day rolled around, I thought it would be the perfect project for the boys to do with their dad. I set everything up and then let Dad cast hands with his boys. They all loved the messy fun. Once I had the casts. I wasn’t sure what to do with them. I didn’t want to put them up somewhere looking like a project from their preschool. So, I modified a creative idea found on another blog. This crafter had mounted round mirrors into plates. My mounted hands looked very handsome in the plates, but they were still not very refined. I decided to try to sand the surface flat in hopes of giving it a more polished look. I took the little hand casts outside and simply rubbed them on a pad of concrete we have out back. I was so pleasantly surprised with how fine they looked after the sanding. The resulting project was something I am quite proud to hang on the wall and I look forward to sending their project off with them one day when they head off into the world.
 TIP: I recommend letting plaster set on all utensils (setting plaster can clog drains!) then scrape, brush and wash utensils.




You must be logged in to post a comment.