Posts tagged ‘decoupage’
butterflies in my kitchen

Things have settled down since the holiday season and I’m ready to tackle projects that have been on hold since October. One project that has been on my “to do” list is to paint my kitchen counter stools to create a visually cohesive look within the space. While my boys were in school I decided to haul the stools outside to give them a good sand down with my nifty Black & Decker mouse.

Committing to a paint color can be difficult at times but for this project I knew that I wanted my counter stools to match the gray countertops & black appliances in my kitchen. I applied several layers of Rustoleum Painter’s Touch Ultra Cover Gray Primer to the legs and allowed an hour to dry. When the primer had adequate time to dry I applied two layers of Rustoleum’s Dark Gray Gloss Ultra Cover and let it sit over night.
The following morning Mr. Polo gave me the “okay” to proceed to the next step.
Several layers of black Behr interior satin enamel “oops paint”, purchased from Home Depot, were applied on the seat edges.
Using a dinner plate as a template I traced an outline onto the backside of my favorite decorative paper and carefully trimmed along my pencil line. Using a foam brush, I applied a layer of Mod Podge to the stool and the backside of my paper and carefully positioned the paper onto the seat. Working from the center I used the edge of an expired Starbuck's gift card to eliminate any air bubbles.
Add three layers of Minwax ploycrylic protective finish to the counter stool, sanding lightly between each coat, and now l have three beautiful stools that match my kitchen perfectly.
Beth
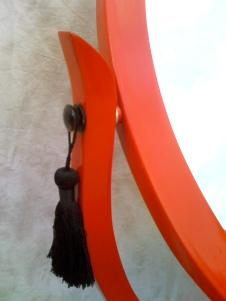
Red Chinese Phoenix Vanity
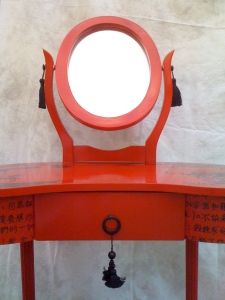 OK, I’m just too sleepy to come up with a pun-y title this morning. If anyone wants to comment with a suggested title, I’m all ears.
This article is a continuation of the article “who says vanity is a bad thing?!“
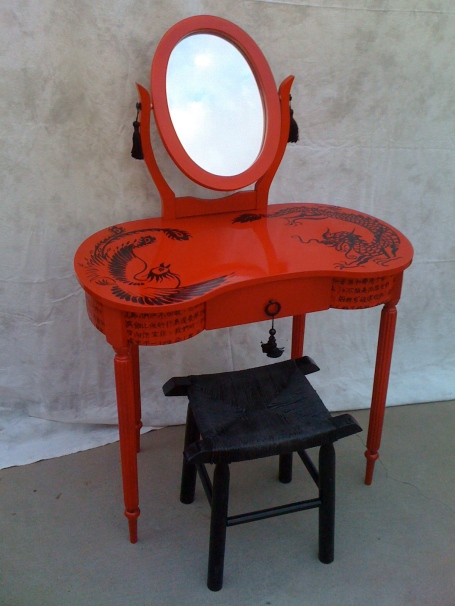
Well, here it is, the big reveal! This is the $3 yard sale vanity I adopted months ago. I actually finished the rehab a few weeks ago, but I have such an extensive set of after photos, I’ve been putting off posting. I plan to include a series of articles on the how-to on this one. But for now, just the fun stuff.
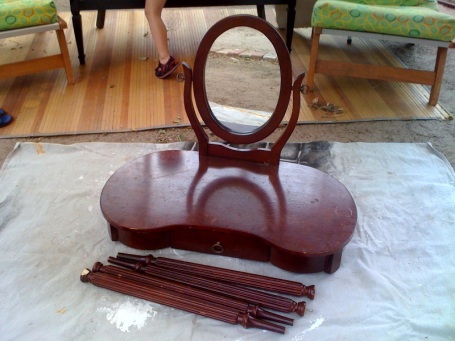
I prepped the vanity by cleaning, sanding and removing all the hardware. I didn’t bother taping off the mirror. I just thought I would scrape off the spray paint with a razor blade when I was done, but that was harder than I thought. The spray paint really set and adhered much better to the glass of the mirror than I would have imagined. If I did it over again. I would insert several pieces of plastic paper between the mirror and the frame and tape them down for a clean and easy finish. I sprayed on a white acrylic primer. It was so pretty in that stage, I wish I took a picture. Red paint is particularly sheer, so it was important to start with a white primer to insure a bright cherry red finish. I used Krylon Banner Red. It was very affordable at Walmart. I think it took 4 bottles, but there were several places where I had to refinish due to bubbling of the finish coat. I finished with 2 coats of a high gloss lacquer spray paint. It did bubble in a couple of places, but I think it was due to the fact that I had left it in the sun and was spraying on a hot surface.
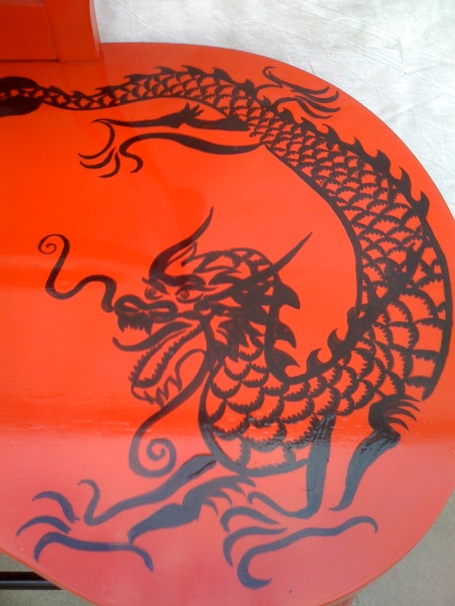
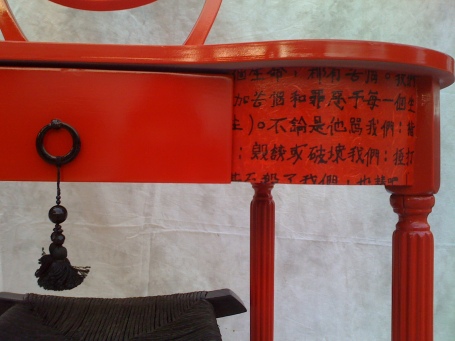
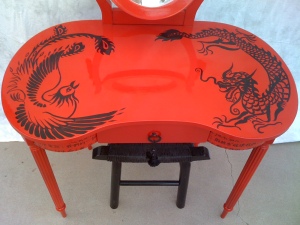 Once the base coat of red was complete, I hand painted the Phoenix and Dragon on the top surface using watered down acrylic paints. I sketched it out using a light color colored pencil first and printed lots of online images to inspire and create my own compilation of the icons. I’ll do a step by step post on that painting in a later post. This part was so fun. After the top was complete, I went to the paper store (see article “Papers!“) you recommended to find a red a black paper. I found a very inexpensive toothy tissue paper with a screened kanji pattern on it that was perfect. I decoupaged the paper onto the vertical surfaces of the unit. This step was really fun, too. It was so fun, I decided to line the drawer for a special surprise inside.
I took process photos of the decoupage, so I will post those later, too. I painted the hardware black and hit those with a durable clear coat of glossy spray paint. I reattached the hardware and she was ready to go!
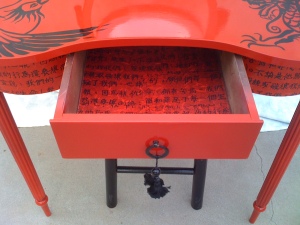 I converted a country looking stool to use as a seat. It had a great asian profile. I’ll post about that separately.
Sadly, I left the vanity outside under my pop-up tent for one day (intending to deliver to the furniture store the following day) and a gust of wind came and knocked the tent over crushing my newly finished vanity. The mirror is broken and two of the legs are busted. I kind of feel like the universe does not want anyone to ever use this vanity. It currently sits in my shed, legless once more. I plan to replace the two broken legs with legs from the local Habitat for Humanity Restore, a great resource for hardware and some furniture parts. But, it was a really fun project and at least I got pictures of it before it was mangled.
Papers!
 I finally got around to visiting the paper store you recommended. It was heavenly. Delicate hand screened printed sheets hung neatly from the wall. Prices ranged from a couple of dollars to $25+. Lots of inspiring crafted paper products and accessories drew me through the store. I lingered on the sealing waxes and seals plated in gold and silver glistening like pirate’s treasure. I basked in the soft pastels of the ceiling covered in various delicate tissue paper items. I was mesmerized by the giant cascading origami chandelier. But I was on a mission.
 I was looking for some red and black paper to finish a hush hush project. I was hoping to be overwhelmed by options, but there were really only two. I walked away with a beautiful red textured tissue paper with black Kanji scrawled across it creating a wonderful graphic pattern. I’ll be using it as a decoupage accent on a furniture piece. I’ll take step by step photos, so I hope I don’t mess this one up! More photos of paper store to follow when I’m not on the road!
Sean Wells via iPhone




You must be logged in to post a comment.